MAKING JAM
BASIC METHOD
Stage 1 – Preparing the jars
Make sure your jars are scrupulously clean; soak off the labels if possible. Sterilize the lids by pouring boiling water them. Leave them
in the hot water for 5 minutes, then place to drain and dry in the air. When your jam is nearly ready (stage 6 below) heat the jars in the oven at 150°C to sterilize them and to stop them cracking when you pour in the hot jam.
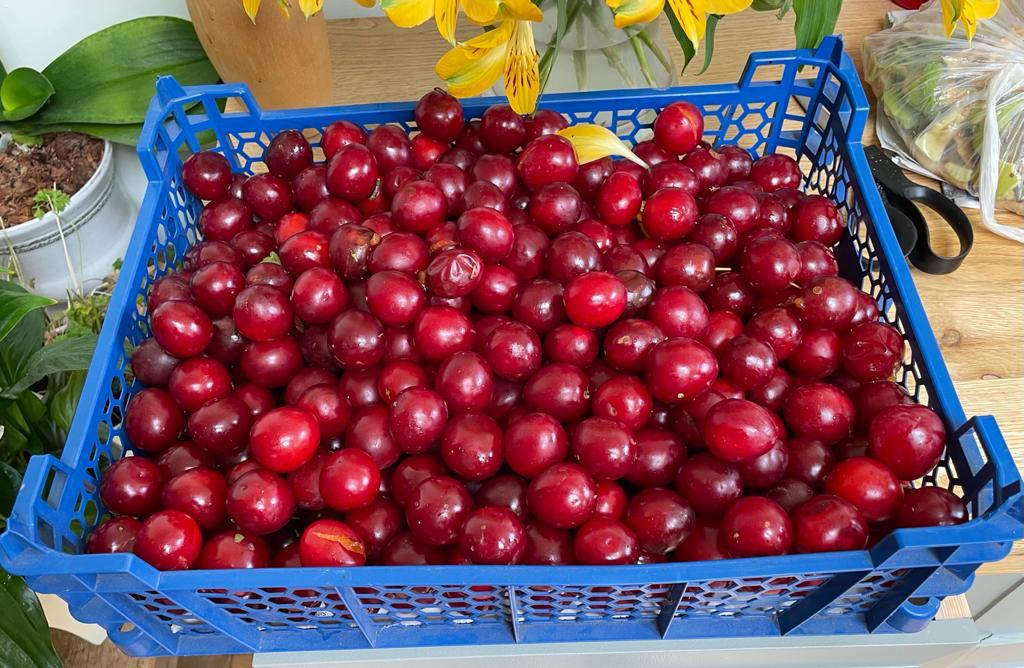
Stage 2 - Selecting the fruit
Avoid over-ripe fruit; slightly under-ripe fruit will probably set more easily. Skin and pips are often high in pectin, which will help the jam or jelly set. For jelly it generally isn’t necessary to peel, core or stone fruit for jelly, but roughly chopping it may make it quicker to cook. Wash the fruit. Remove stones if necessary.
Stage 3 - Soften the fruit
Add water if the recipe specifies. Simmer gently over a low heat until the fruit is really soft. Stir occasionally to prevent it burning. This can also be done in a slow-cooker or in a tightly covered pot in a very low oven – 140°C (in which case reduce or omit the water, depending on how juicy the fruit naturally is).
Time taken will depend on the fruit.
Stage 4 – for jelly –Strain the juice
Put all the fruit and liquid in a jelly bag (a muslin bag which is suspended over a bowl) and let all the juice drain out overnight.
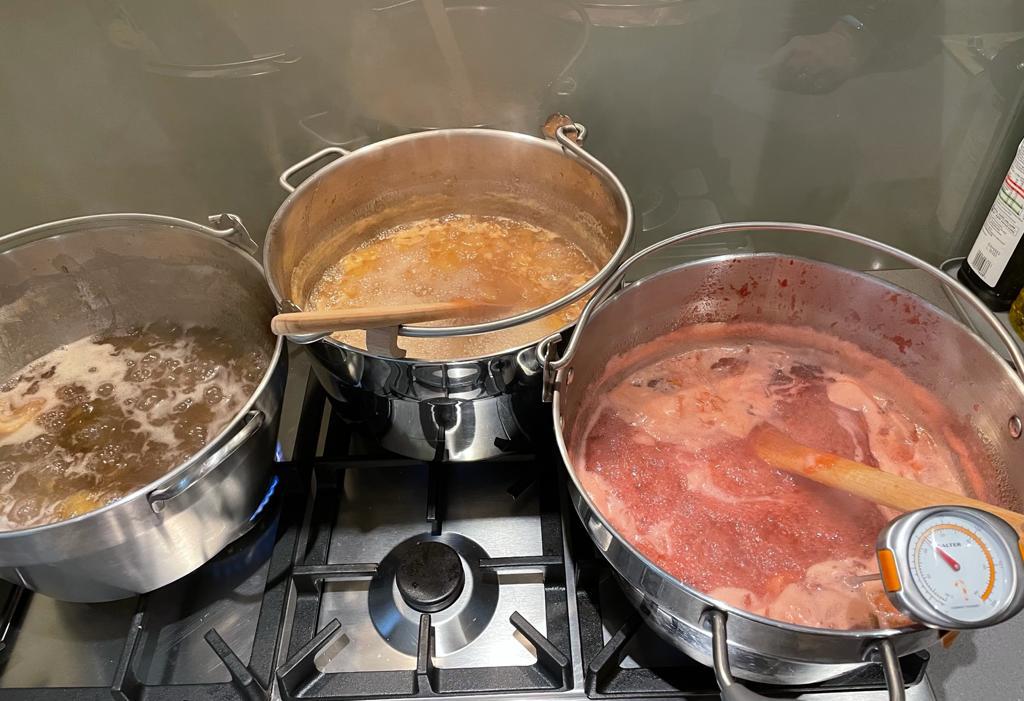
Stage 5 – Add the sugar
Use a preserving pan, or other large heavy bottomed pan. The larger the diameter of the pan the quicker the cooking process will be. Use normal granulated sugar; there should be no need to go to the expense of using preserving sugar or pectin solutions. Weigh out the sugar (for jelly you will usually need 1lb sugar for 1pint of juice/ 450g sugar for 600ml). Stir it into the fruit/warmed juice over
a gentle heat, until it is all thoroughly dissolved and there is no gritty feel when you stir the pan. Then bring the mixture up to the boil and boil rapidly. This is when you need to make sure the jam doesn’t boil over! Stir occasionally to prevent it sticking to the bottom of the pan.
Stage 6 – Setting point
After about 10 minutes take a teaspoonful of jam, put it on a small plate and put the plate in the fridge. Meanwhile keep the jam boiling. Remove the plate from the fridge after 5 minutes. Run your finger fingertip gently across the surface of the jam. If it crinkles (ie a light skin has formed) the jam has reached setting point. Turn the heat off. Make sure your jars are heated in the oven (see stage 1 above). If the jam sample is still liquid and no skin forms return your spoonful of jam to the pan and continue boiling for another 5 or 10 minutes before testing again.
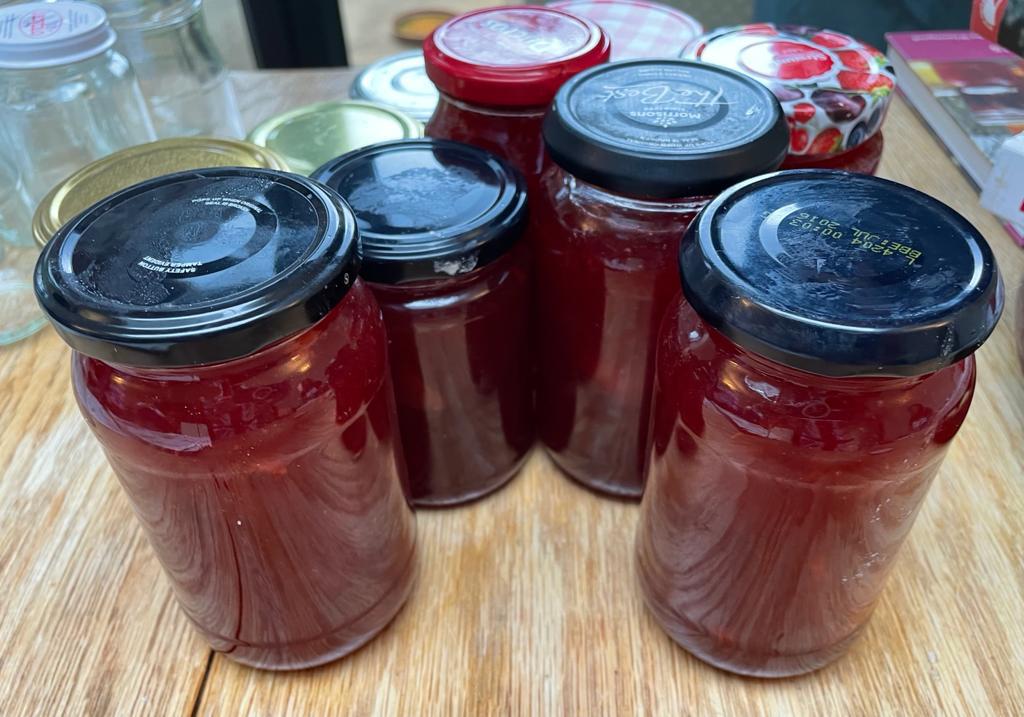
Stage 7 – Filling the jars
Use oven gloves to place the heated jam jars on some newspaper close to the stove and your preserving pan. If a foamy scum has formed on top of the jam or jelly skim it off. It is perfectly edible so you might want to put it onto a plate and store in the fridge to eat later, but it detracts from the appearance of the jelly or jam, so it is best removed. A jam funnel helps pour the jam neatly into the jars. Use a cup or a jug to pour from. Fill the jars very full; the jam will shrink as it cools. Cut circles of greaseproof paper to fit the jars and place over the full jars. Carefully screw the lids on tightly before the jam has totally cooled, wiping the necks of the jars to remove any spills if necessary. When the jars are cool label and store in a cool dark place.
N.B. Remember to label your jars saying what it is and when it was made. If plums or any other stoned fruit was used, you should
include a note that there might be stones in the product. (Do this, even if you stoned the fruit, as it’s really difficult to get every last one out). Also, if you used nuts, include that on the label too.
Stage 1 – Preparing the jars
Make sure your jars are scrupulously clean; soak off the labels if possible. Sterilize the lids by pouring boiling water them. Leave them
in the hot water for 5 minutes, then place to drain and dry in the air. When your jam is nearly ready (stage 6 below) heat the jars in the oven at 150°C to sterilize them and to stop them cracking when you pour in the hot jam.
Stage 2 - Selecting the fruit
Avoid over-ripe fruit; slightly under-ripe fruit will probably set more easily. Skin and pips are often high in pectin, which will help the jam or jelly set. For jelly it generally isn’t necessary to peel, core or stone fruit for jelly, but roughly chopping it may make it quicker to cook. Wash the fruit. Remove stones if necessary.
Stage 3 - Soften the fruit
Add water if the recipe specifies. Simmer gently over a low heat until the fruit is really soft. Stir occasionally to prevent it burning. This can also be done in a slow-cooker or in a tightly covered pot in a very low oven – 140°C (in which case reduce or omit the water, depending on how juicy the fruit naturally is).
Time taken will depend on the fruit.
Stage 4 – for jelly –Strain the juice
Put all the fruit and liquid in a jelly bag (a muslin bag which is suspended over a bowl) and let all the juice drain out overnight.
Stage 5 – Add the sugar
Use a preserving pan, or other large heavy bottomed pan. The larger the diameter of the pan the quicker the cooking process will be. Use normal granulated sugar; there should be no need to go to the expense of using preserving sugar or pectin solutions. Weigh out the sugar (for jelly you will usually need 1lb sugar for 1pint of juice/ 450g sugar for 600ml). Stir it into the fruit/warmed juice over
a gentle heat, until it is all thoroughly dissolved and there is no gritty feel when you stir the pan. Then bring the mixture up to the boil and boil rapidly. This is when you need to make sure the jam doesn’t boil over! Stir occasionally to prevent it sticking to the bottom of the pan.
Stage 6 – Setting point
After about 10 minutes take a teaspoonful of jam, put it on a small plate and put the plate in the fridge. Meanwhile keep the jam boiling. Remove the plate from the fridge after 5 minutes. Run your finger fingertip gently across the surface of the jam. If it crinkles (ie a light skin has formed) the jam has reached setting point. Turn the heat off. Make sure your jars are heated in the oven (see stage 1 above). If the jam sample is still liquid and no skin forms return your spoonful of jam to the pan and continue boiling for another 5 or 10 minutes before testing again.
Stage 7 – Filling the jars
Use oven gloves to place the heated jam jars on some newspaper close to the stove and your preserving pan. If a foamy scum has formed on top of the jam or jelly skim it off. It is perfectly edible so you might want to put it onto a plate and store in the fridge to eat later, but it detracts from the appearance of the jelly or jam, so it is best removed. A jam funnel helps pour the jam neatly into the jars. Use a cup or a jug to pour from. Fill the jars very full; the jam will shrink as it cools. Cut circles of greaseproof paper to fit the jars and place over the full jars. Carefully screw the lids on tightly before the jam has totally cooled, wiping the necks of the jars to remove any spills if necessary. When the jars are cool label and store in a cool dark place.
N.B. Remember to label your jars saying what it is and when it was made. If plums or any other stoned fruit was used, you should
include a note that there might be stones in the product. (Do this, even if you stoned the fruit, as it’s really difficult to get every last one out). Also, if you used nuts, include that on the label too.
|
|

|
